In this article you will see how to receive items using Ventor – Odoo inventory mobile app. Basic receiving, changing default location (put away), adding a barcode for a product from a barcode scanner, lots and SN management, putting on pallets (packages).
Also, we recorded a video, and you can watch it on our YouTube channel:
Table of contents
- Prerequisites
- Case 1: Change destination location on receiving (put away)
- Case 2: Add product barcode in Odoo via a barcode scanner
- Case 3: Split on receiving to put part of a batch on a different shelf
- Case 4: Create a lot on receiving and put it on a pallet
- Case 5: Create serial numbers on receiving by scanning SN barcodes
Prerequisites
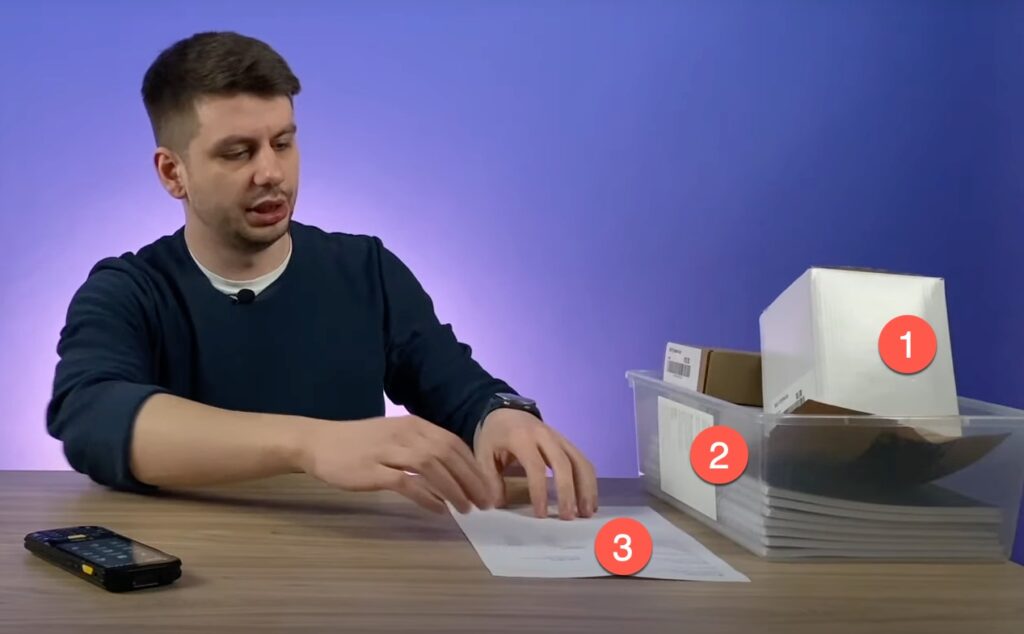
Before we start, we have:
1. An incoming shipment (physical goods)
2. A label with Internal reference
3. A delivery document with a barcode
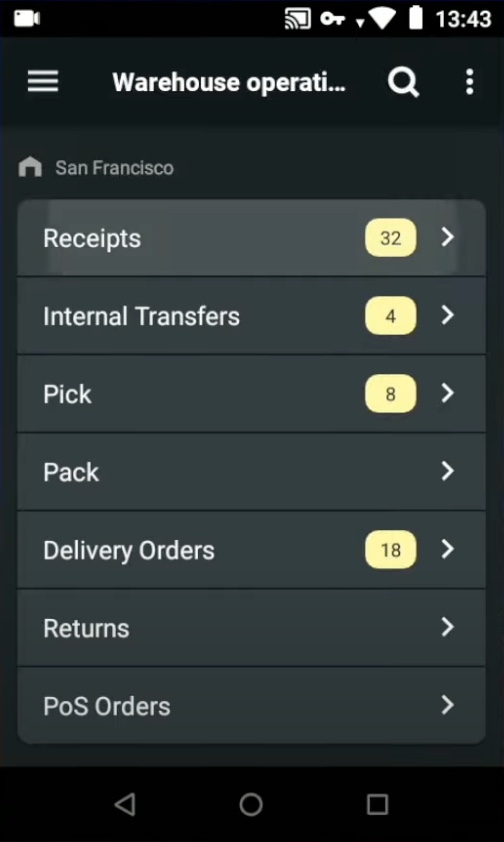
Open the Ventor app (How to connect to your Odoo), choose ‘Warehouse operations’ and open a ‘Receipt zone’ to find incoming shipments.

You can also scan any item from this order right here to immediately find all the orders where the same item is presented. But in this article, we are going to open the item and find the orders manually. Click on the ‘Search’ and insert the number ’57’

We’ve just found this order. Let’s open it and start the transfer.
Case 1: Change destination location on receiving (put away)
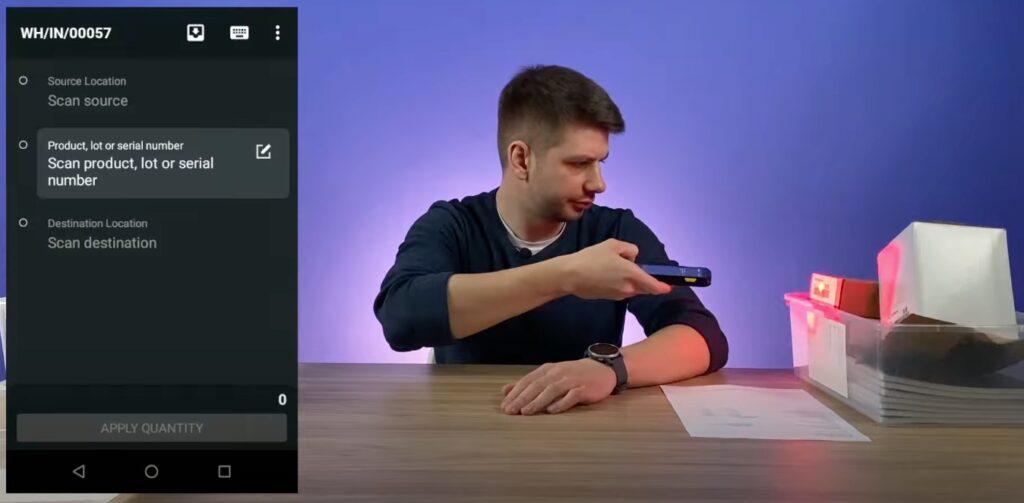
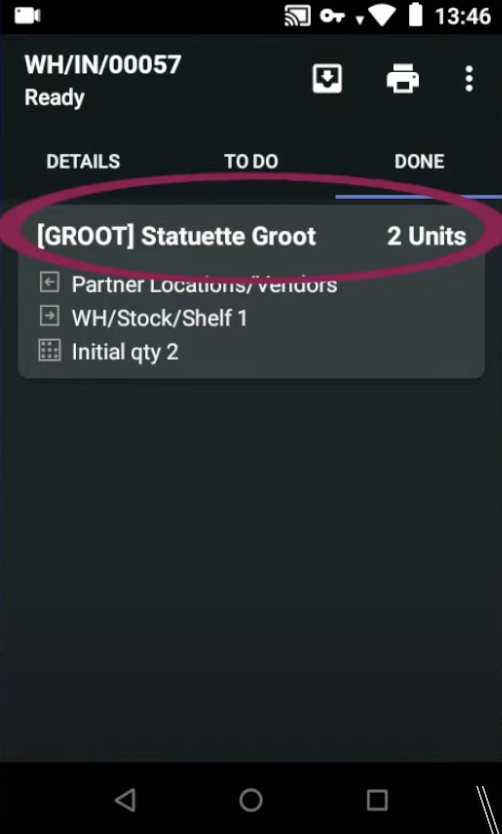
Click on the ‘Start transfer’ and scan the first item.
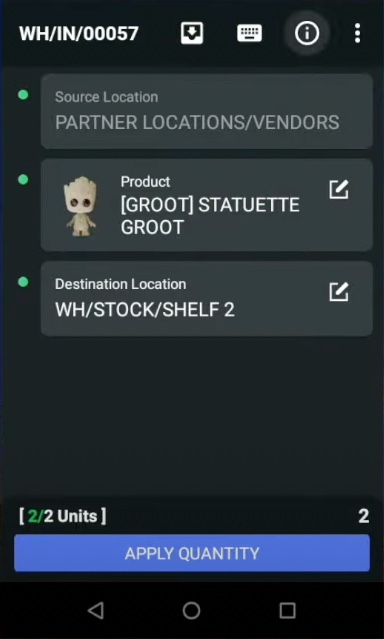
We have two Groot statuettes. Here we have all the information from where we are taking these items, from the ‘Vendors’ location to the distinction location on ‘Shelf 2’.
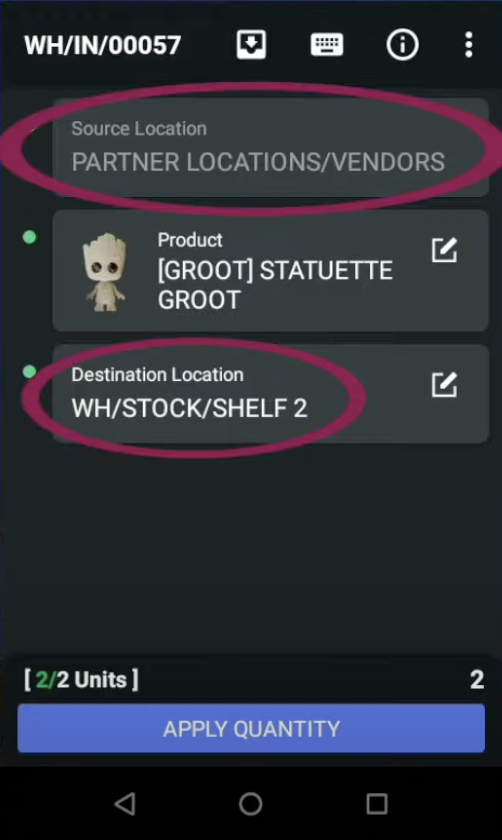
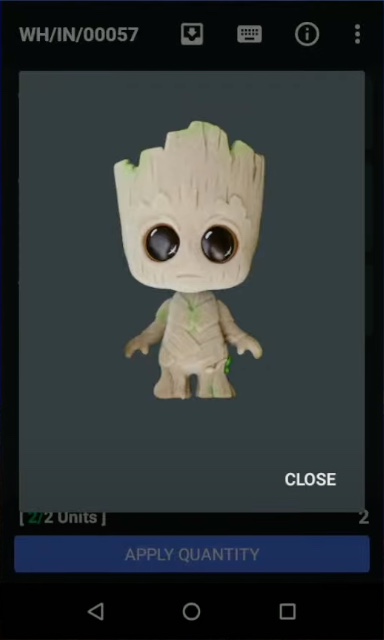
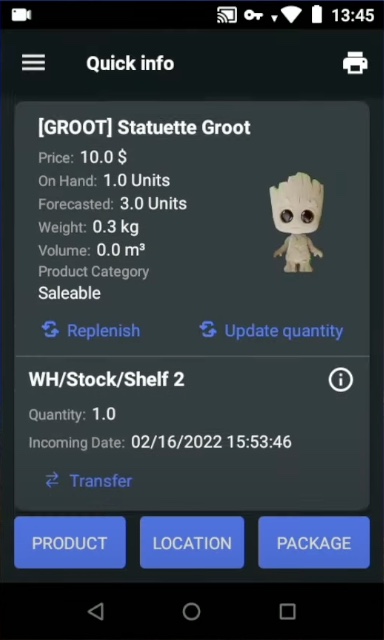
You can click on the image of the product to see it in a bigger size, so you can quickly compare what you’re receiving and what you have in the system. Also you have a ‘Quick info’ button: if you click on it, you can find where else this item is located, like on ‘Shelf 2’.
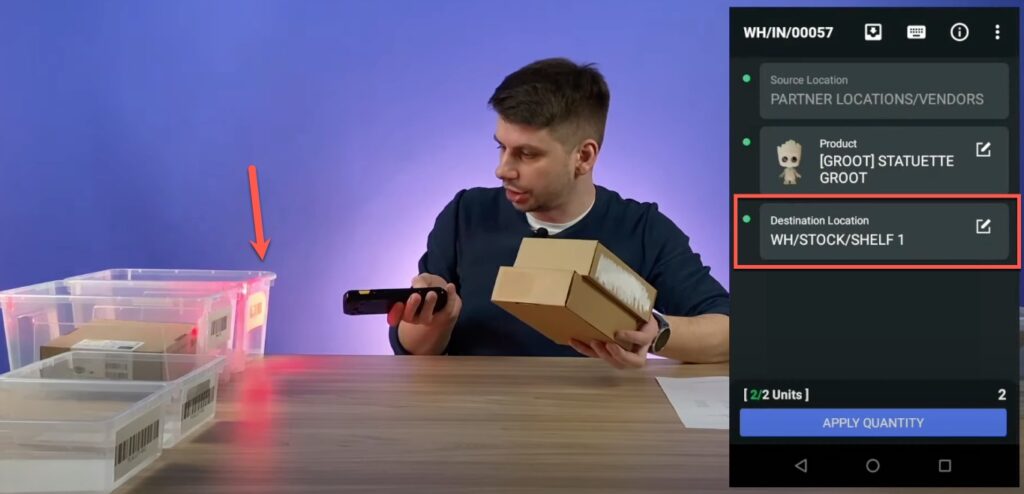
Let’s go ‘Back’ and put these two items into the ‘Shelf 2’ location, and then you can confirm it. You can also change the destination location in Odoo, for example, it should be going to ‘Shelf 2’, but there is not enough space, so you can change the location – exchange the original location from ‘Shelf 2’ to ‘Shelf 1’ and put these two items into ‘Shelf 1’.
Click ‘Apply quantity’, and we are ready to scan the next item. So now, let’s quickly check that these 2 items were moved to ‘Shelf 1’. Go to the Done tab. Here we can see that 2 units of this statuette Groot were already moved to ‘Shelf 1’.
You can click ‘Back’ to close this order and then open it once again. At any time, you can move back to get some rest and then move back to the order and pick it again. So, click on ‘Continue transfer’, and we are ready to scan the next item.
Case 2: Add product barcode in Odoo via a barcode scanner
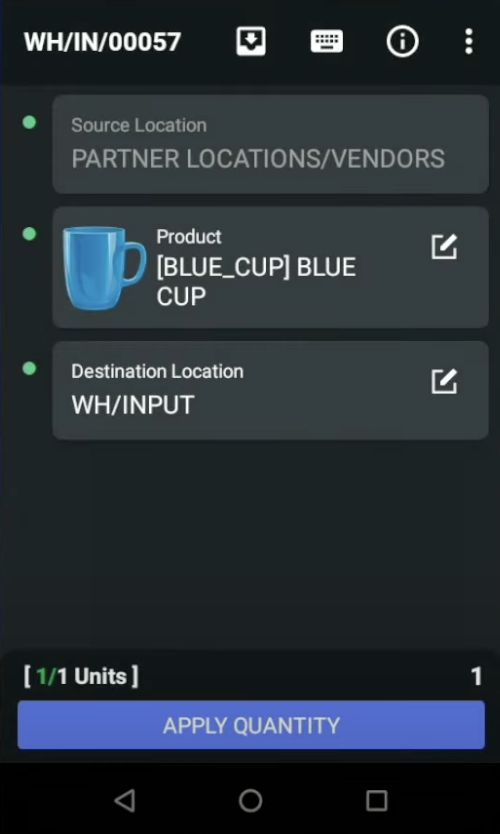
Let’s take the next item, a ‘Blue cup’. But after scanning it, we get an error:
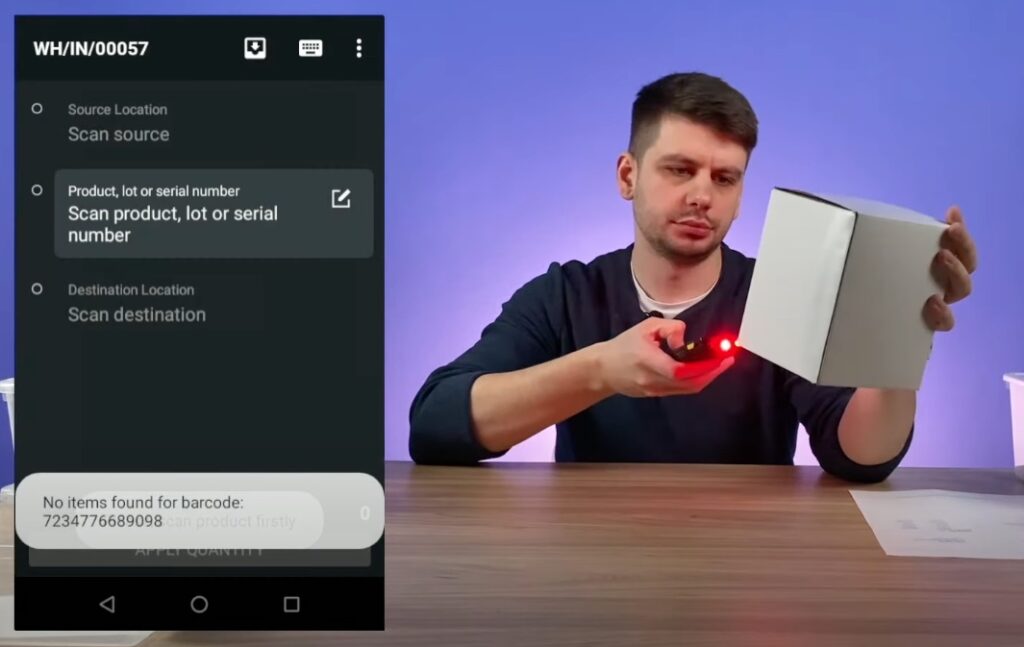
First of all, let’s check if this product really should be in this order.
This product is present in the Odoo view, but its barcode is missing. It’s a common situation; what can we do?
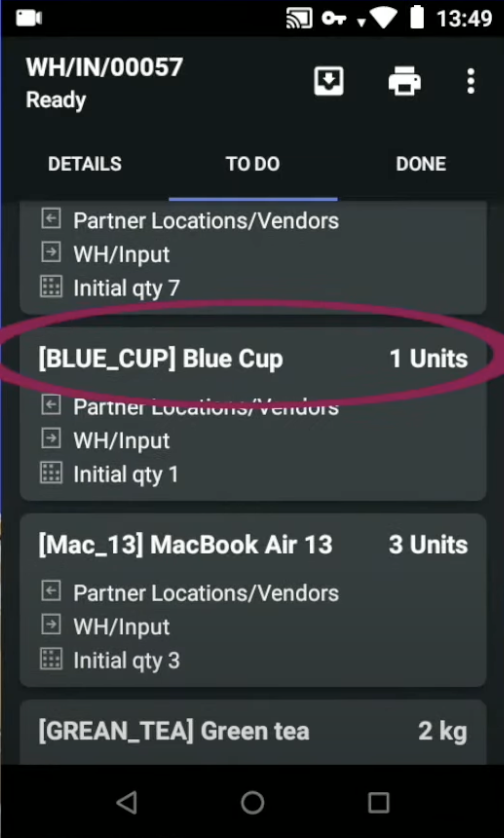
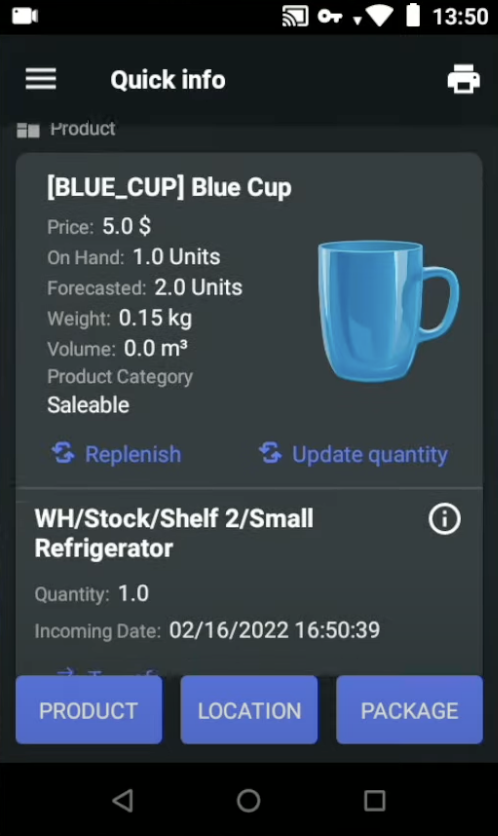
First of all, we can choose this product manually: Click on ‘Blue cup’ and then click on the ‘Info button’. Here we can get additional information about this product.
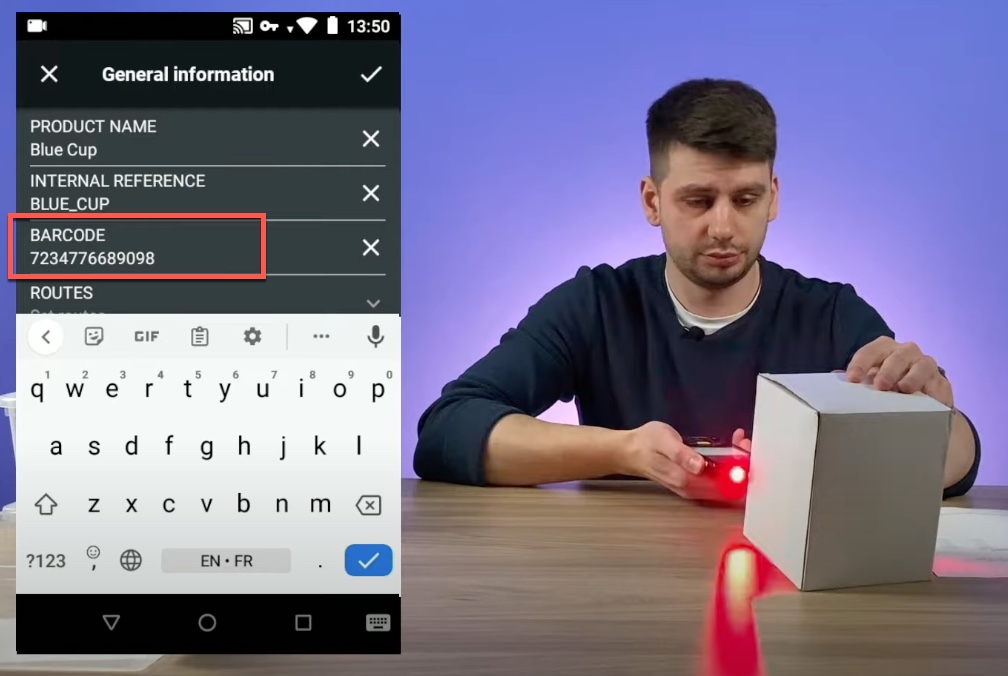
Let’s click on the ‘additional info’, and we have many fields related to this product here. We see that the ‘Barcode’ field is empty. Let’s scan it in right now.
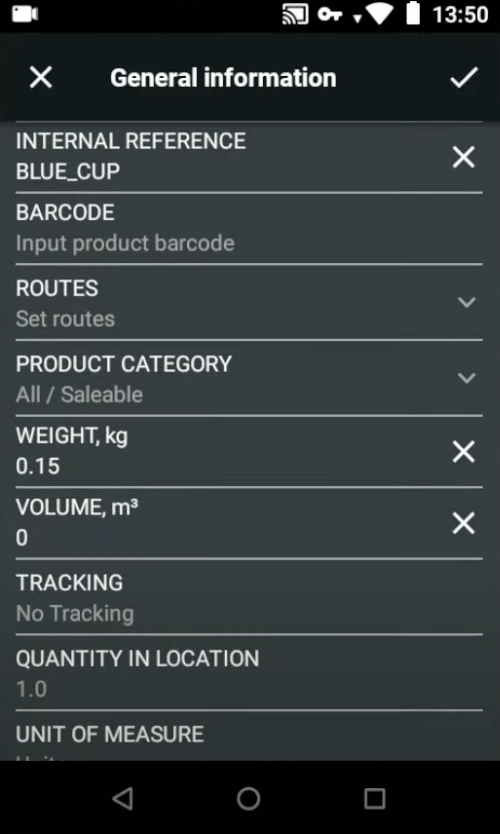
Fill in, click ‘Save’, and move back.
Now we are ready to apply the quantity of this item and move it to the ‘Input zone’ or check it once again. Next, click ‘Back’ and then click ‘Continue transfer’ and scan it one more time. Now the product can be recognized.
During the reception process, we are ready to quickly go to Ventor’s ‘Quick Info’ menu and update the information about this product to make it possible to receive it in future, without needing to put this information on the Odoo site and so on. It’s a really useful feature to update some fields right on the reception or picking process.
We want to put the product into the ‘Input’ zone, so click on the ‘Apply’ button and move it to the ‘Input zone’, and the process is finished.
Case 3: Split on receiving to put part of a batch on a different shelf
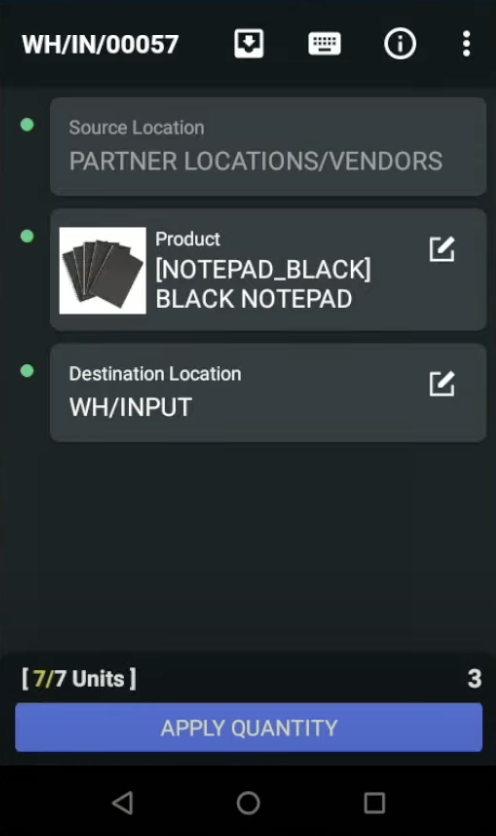
In this case, we have 7 notebooks. Either you can scan them 7 times, or you can just get the information about this product and insert ‘7’ on your physical keyboard.
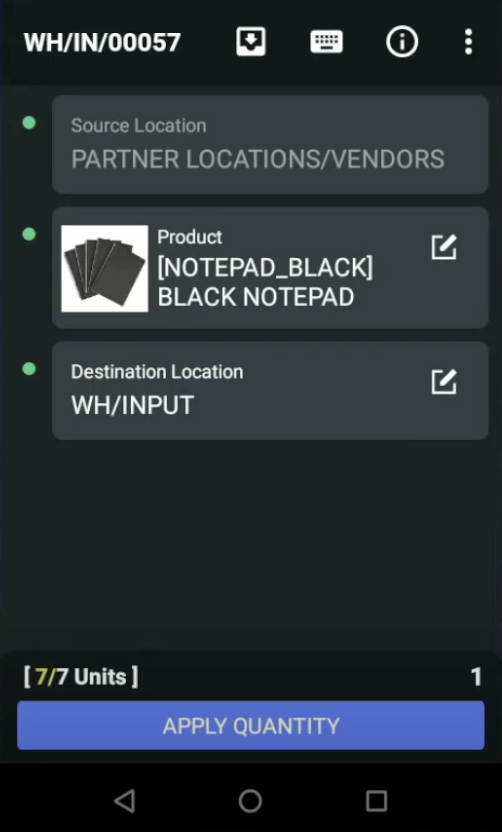
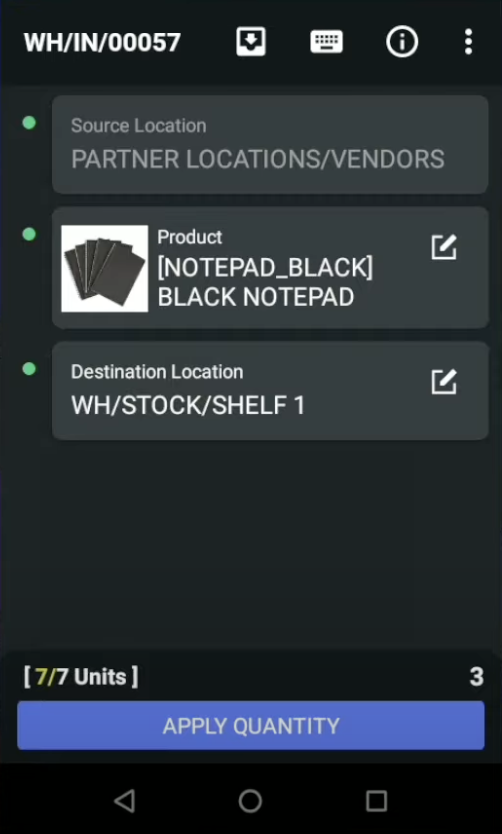
We want to split this item, putting 3 of them into ‘Shelf 1’ and 4 of them into ‘Shelf 2’. First, we insert ‘3’ and then put this into ‘Shelf 1’. By default, the destination location is the input zone, but we can change it to ‘Shelf 1’ and apply the quantity.
As you might see, ‘4’ is left out of ‘7’, because ‘3’ were already moved to ‘Shelf 1’.
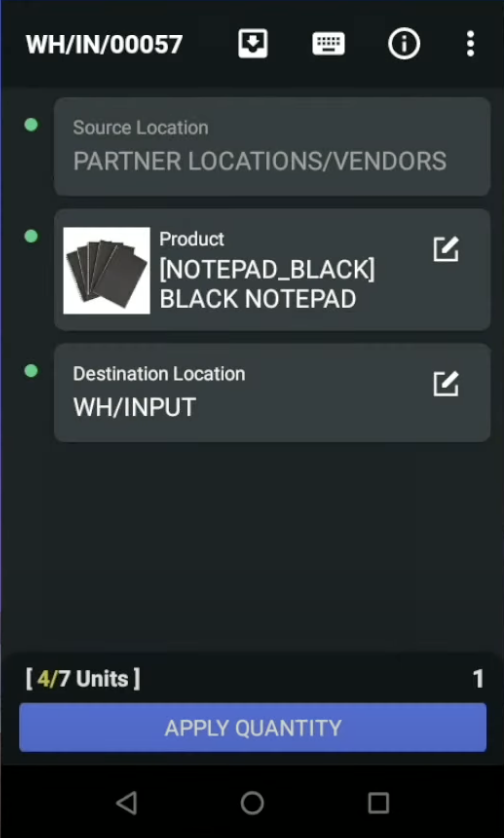
Still the ‘Destination location’ is the input zone, so we need to change it to ‘Shelf 2’ here and insert ‘4’. Click on ‘Apply quantity’ and go back just to check that everything is correct.

Case 4: Create a lot on receiving and put it on a pallet
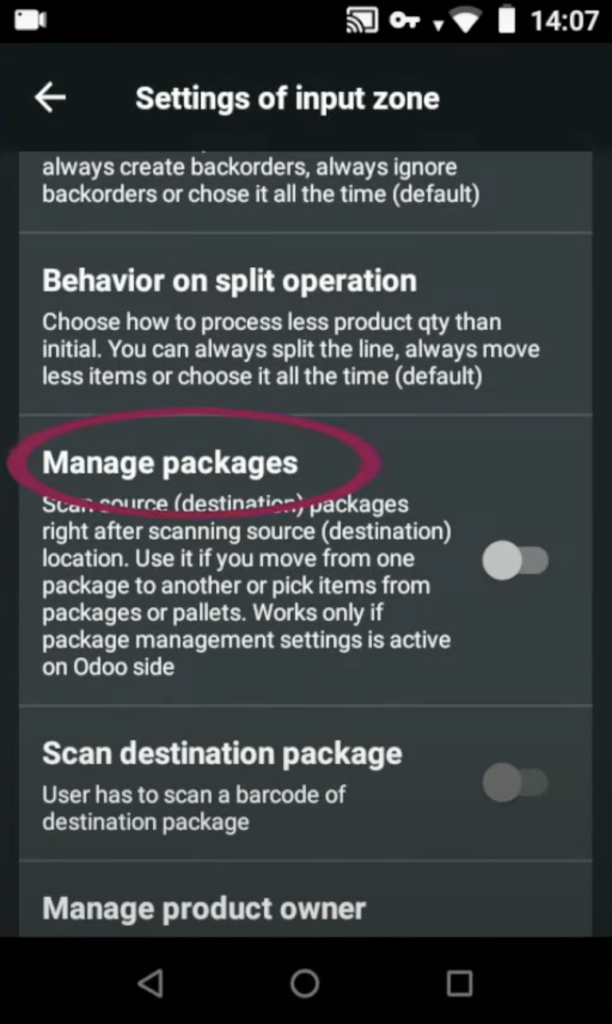
In this case, we are going to put green tea packs on one of the palettes. We need to activate ‘Palette management’. Let’s go back, click on ‘Settings’, swipe down, and find ‘Manage packages’. Let’s activate it. By default it’s deactivated, and it’s up to you when to activate package management.
Click on ‘Continue transfer’ and scan these 2 packages of green tea.
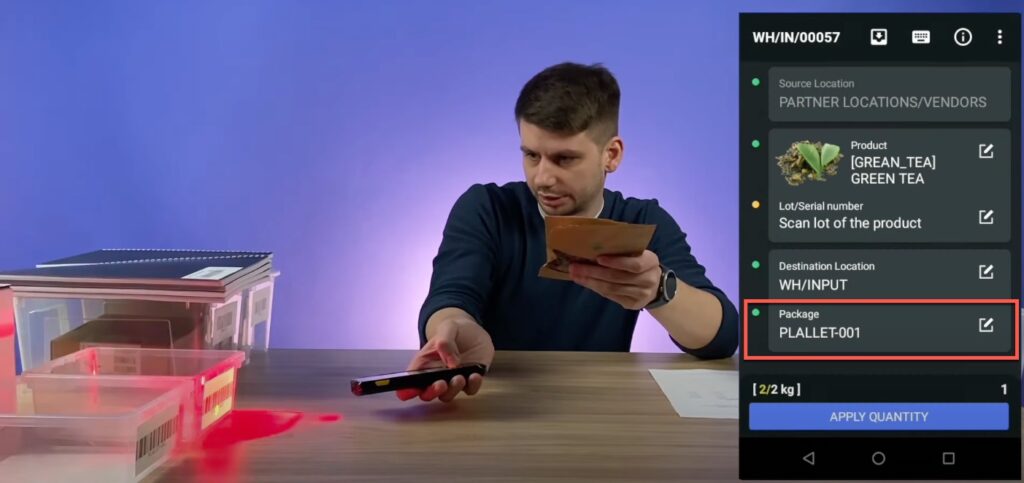
We have all the information here, we’re going to put it into the ‘Input zone’, but additionally we want to put it into palette number 1. So let’s scan it the package should be filled with ‘Palette 1’.
But the application is asking us to insert the ‘Lot number’, because this green tea is tracking by ‘Lot’. By click on it to create the lot manually, we have a suggested ‘Lot 1’, but we are going to create a new one – Lot-0001. Also, let’s insert expiration date – May 18.
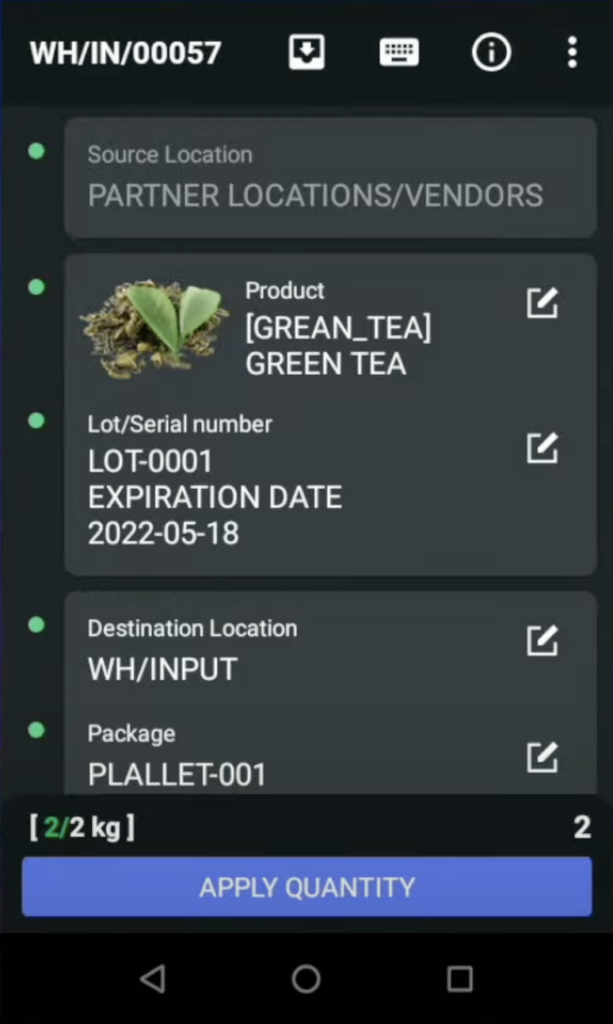
Put the lot into the palette and click on ‘Apply quantity’. Case completed!
Case 5: Create serial numbers on receiving by scanning SN barcodes
We have 3 MacBook Airs.
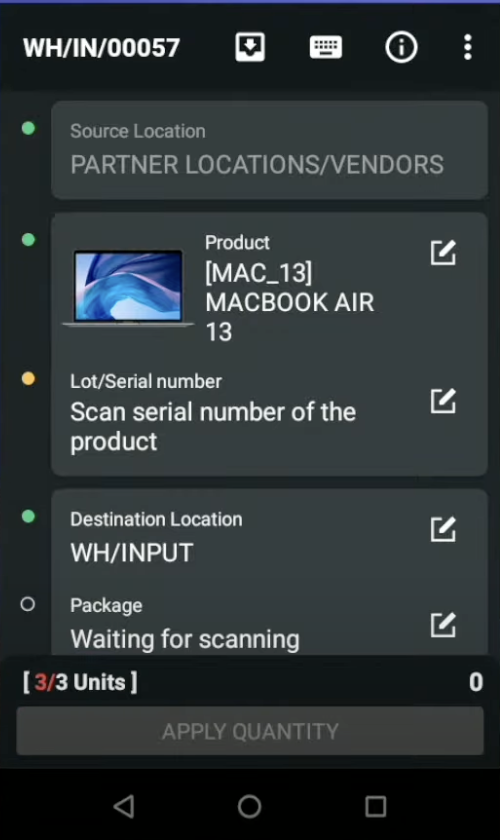
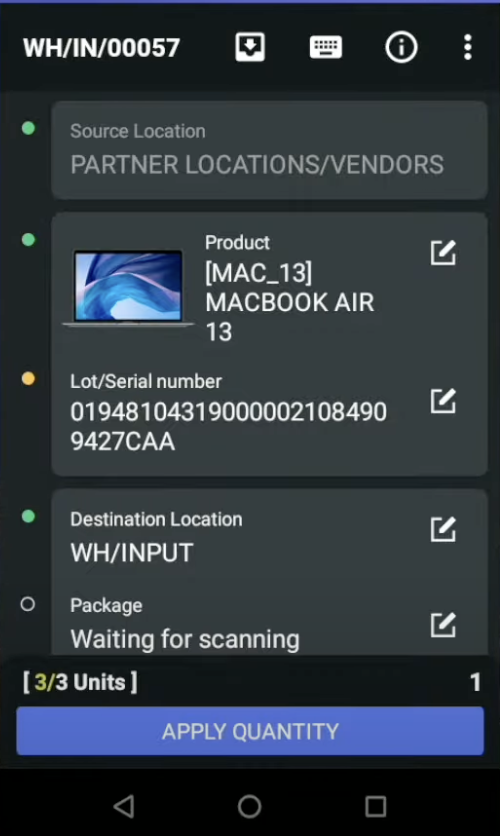
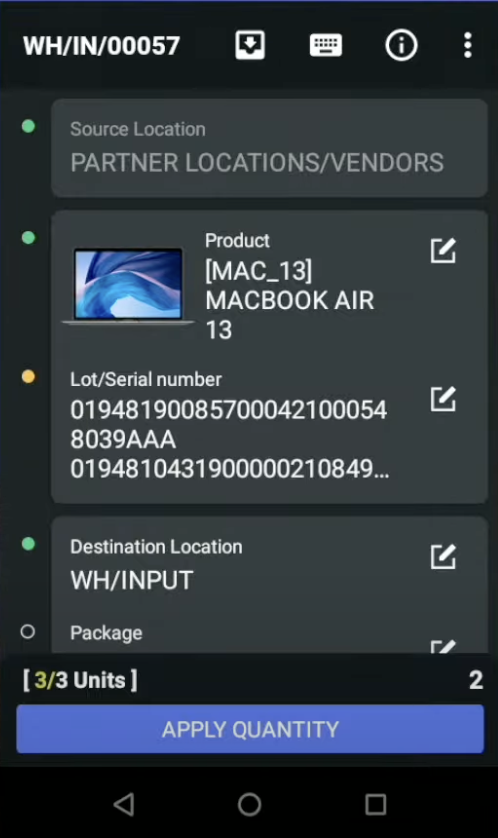
This product is tracked by ‘Serial number’, and we need to receive 3 different serial numbers to track them later. Let’s scan it.
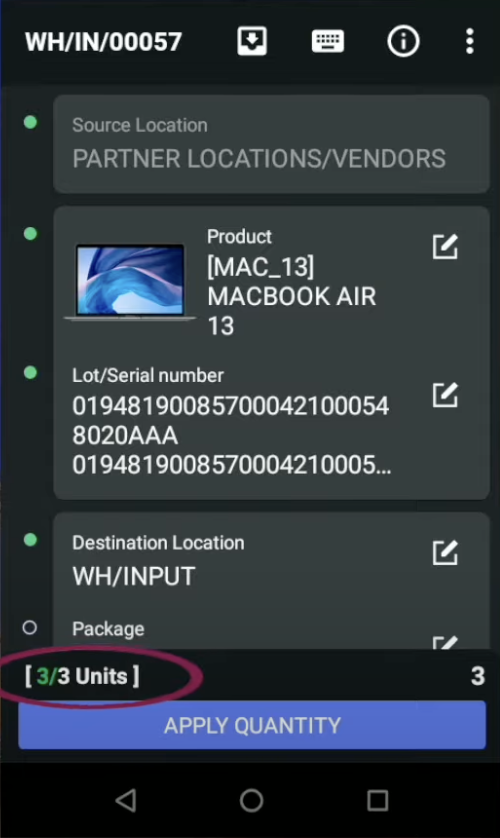
Let’s scan palette number ‘2’ to put them all in this palette for this package. Click on ‘Apply quantity’. The transfer should be validated automatically.
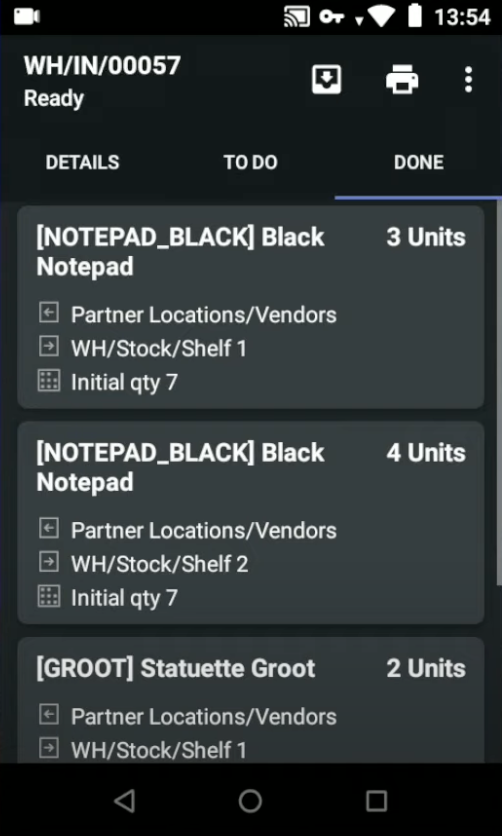
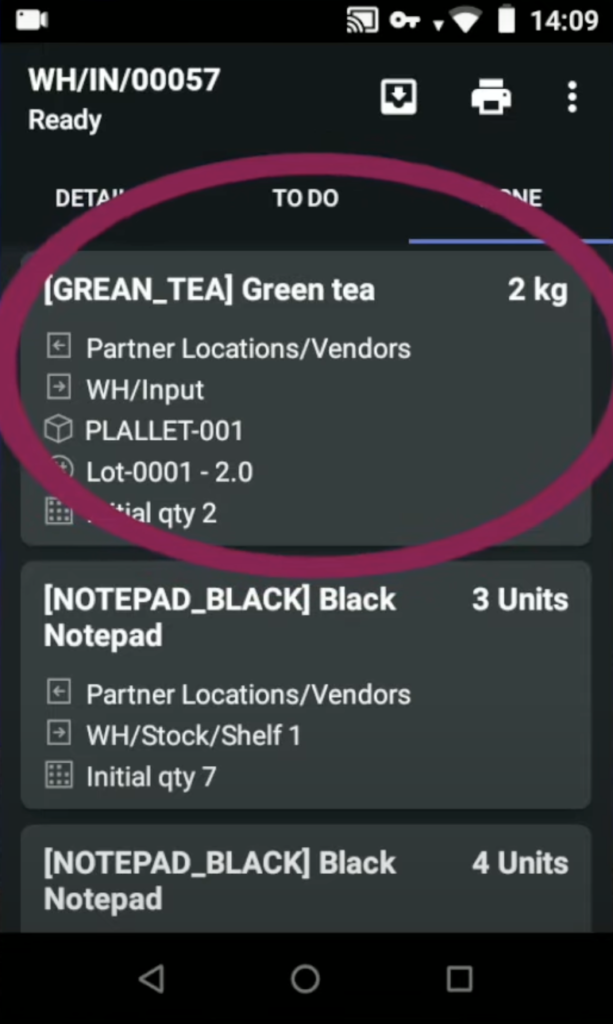
Let’s finally check our order. Open it and let’s check the Done tab: 3 black notepads, 4 black notepads, 2 Groot statutes, and 1 Blue cup in the input zone; green tea on palette number 1 and 3 MacBook Airs that were put on palette number 2.
This order was received! Now, using Ventor, you can easily receive your products in Odoo in just a few steps.
We hope that you have found answers to your questions in our article. If you have any other questions, then feel free to leave your comments under this article. We look forward to hearing from you!
***
Ventor: Quick Start Guide – ventor.app/guides/ventor-quick-start-guide/
Ventor complete guide. Introduction – ventor.app/guides/ventor-introduction-guide/
Make Odoo inventory quickly and accurately using Ventor app – https://ventor.app/guides/make-odoo-inventory-quickly-and-accurately-using-ventor-app/
Feel free to subscribe to our newsletter and follow us on Linkedin to stay up to date with our latest news.
CBDO at VentorTech


Riza Mananaong
Hi, Can I ask how to show the serial number/barcode number during transfer like once i scan i wanna double check if its scan the correct barcode.
Katya Baravikova
Hi Riza,
You might find the answer you’re looking for in the article—specifically in Case 5.
If your question isn’t covered in the article, our support team is ready to assist. You can reach out to them directly through our support portal at https://support.ventor.tech, where you can send requests to the relevant departments within our company. It’s also helpful if you include any screenshots, videos, or other materials that could assist our team.