Installation
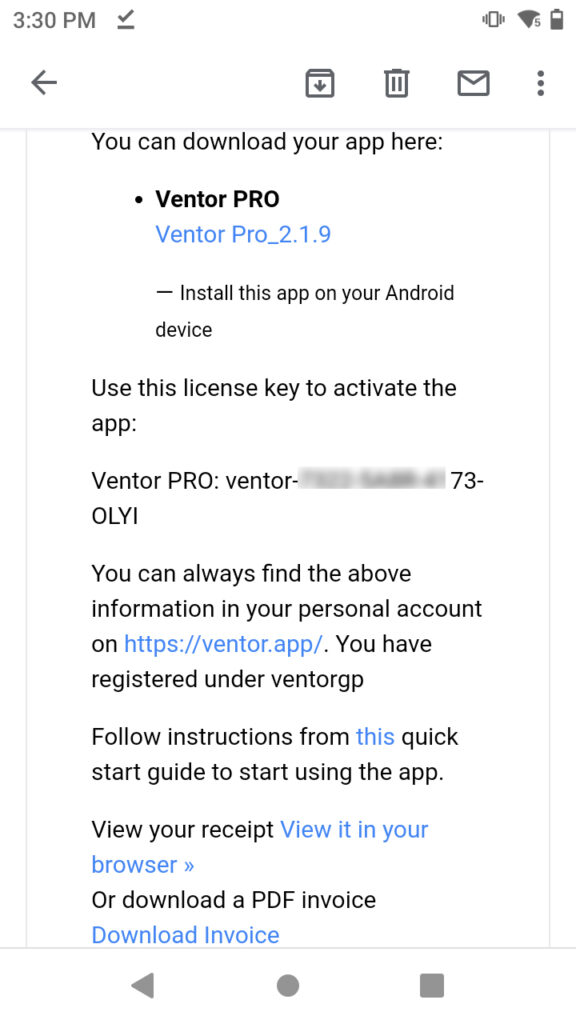
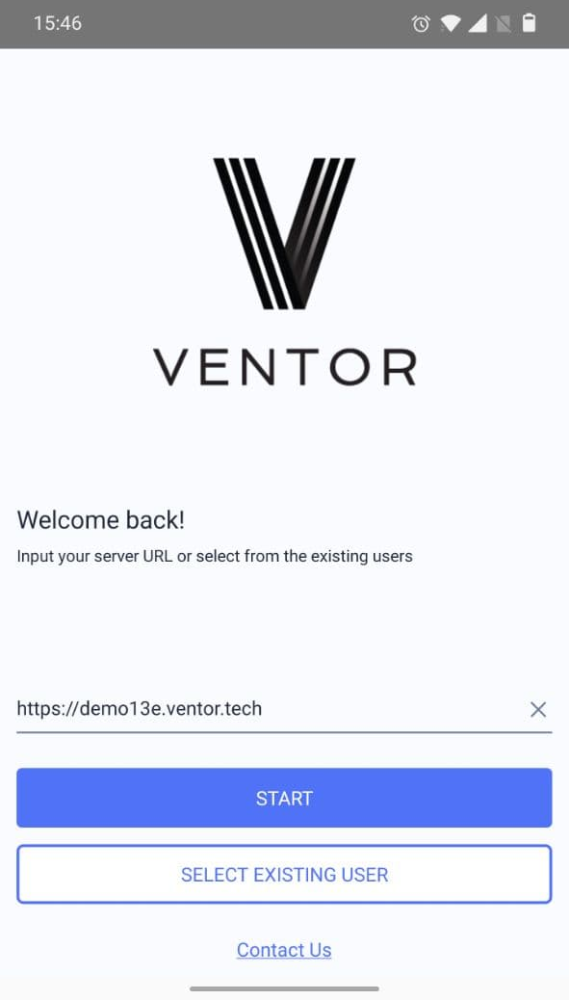
First of all download the app using a link from the confirmation email (click on the “Download here” button). During installation on your phone or tablet, you may be asked to allow installation of applications that are not from Google Play. The next step – insert your server URL, then user login and password (database name is needed only if you have multi-databases). Use the “Contact Us” button to drop us an email or get support.
Warehouse operations
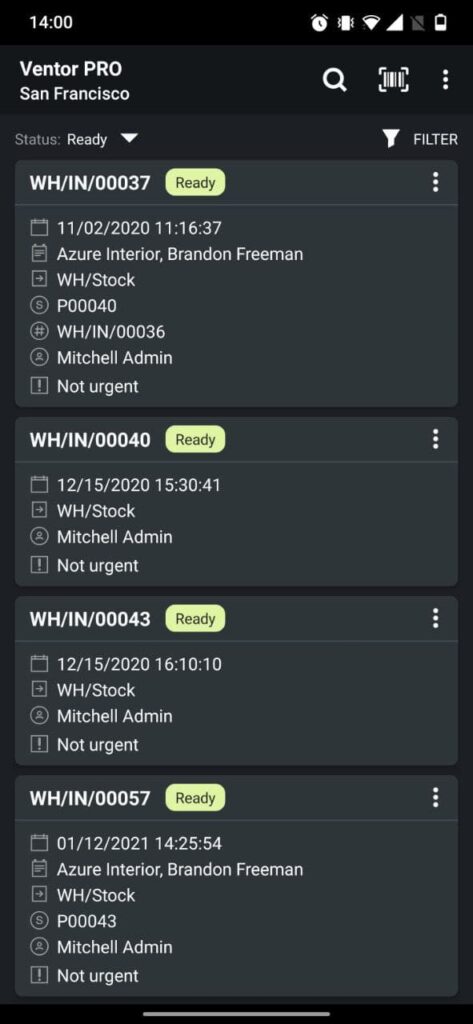
This menu represents a full copy of the Odoo Inventory Dashboard. The menu shows all available warehouses and their operations types (Receipts, Pick, Pack, Delivery, etc). The number of operations zones depends on your warehouse configuration. You can see the numbers of available pickings ready to be processed next to each zone (operation type). Click on a zone to see the list of all available transfers.
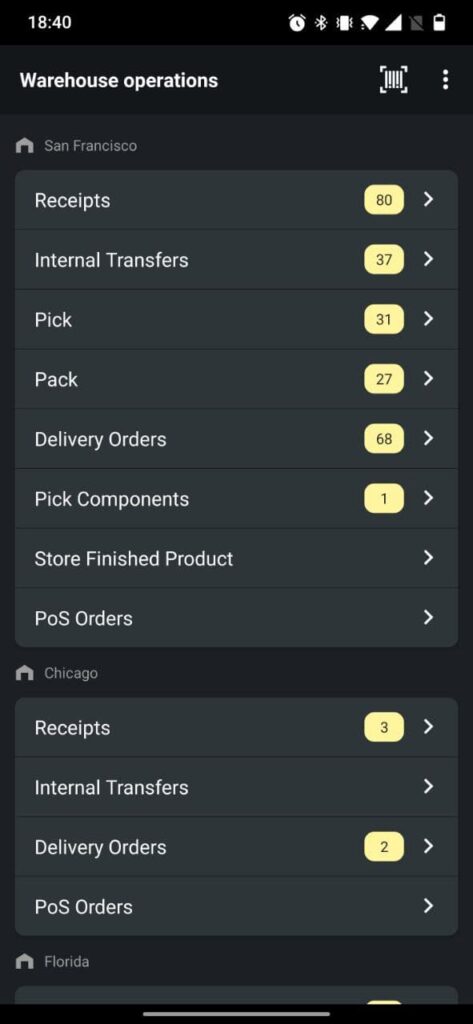

You can use filters inside any of the operation types by clicking a special button to add additional parameters, such as status, contact name, or schedule date. You can also find whatever you need using a search button. Click on any document (transfer) to start picking or use the scanner to scan internal references of the document (e.g., “WH/IN/0000234”) and quickly open it.
Find instructions below for all frequent operations.
Receiving (Receipt / Input / Internal transfers)
Watch the video or read the article – ventor.app/guides/receiving-goods-in-odoo-via-barcode-scanner/

Or follow these instructions:
- Open the “Warehouse Operations” menu.
- Choose a warehouse and open the “Receipts” operation type. You can use your scanner to search a document right from this screen.
- Click on the needed transfer to open the related document.
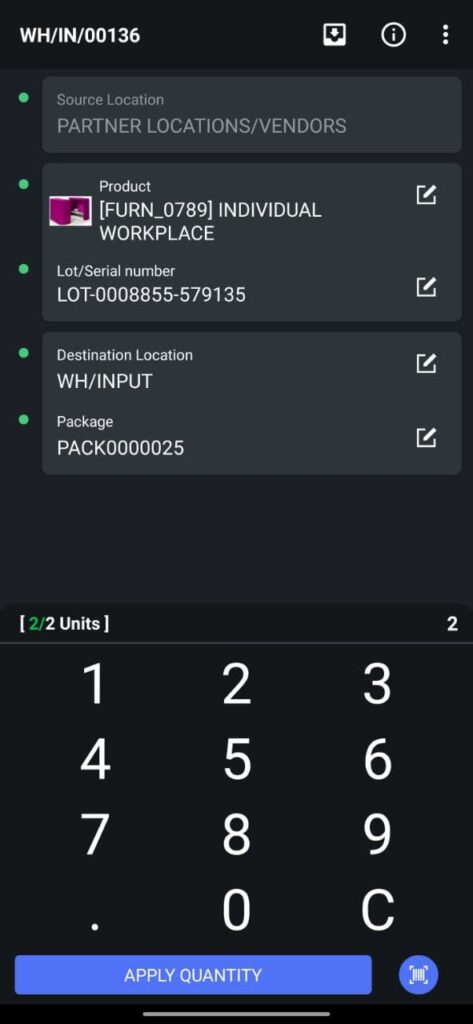
You can also scan a barcode of the PO/Reference to open the needed transfer by clicking on a special barcode icon (on phones) or simply scan using the scan button on your handheld device. - By default, you need to scan the product barcode using a scanner button or use manual input (pencil icon) to find a product manually (same for any other field).
- Add QTY of the product and change destination location (if needed), then click on the “Apply Quantity” button to move the product. The next item will appear automatically (if any are left).
- You can also scan GS1 barcodes, and the app will instantly fill in QTY, Lot / SN, Package, weight, and so on.
Title for This Block
Description for this block. Use this space for describing your block. Any text will do. Description for this block. You can use this space for describing your block. Description for this block. Use this space for describing your block. Any text will do. Description for this block. You can use this space for describing your block.
Delivery (Pick / Pack / Delivery orders)
Watch how to pick orders in Odoo:

Or follow these instructions:
- Open the “Warehouse Operations” menu.
- Choose a warehouse and open the “Delivery orders” (“Pick” or “Pack” if any) operation type. You can use your scanner to search a document right from this screen.
- Click on the needed transfer to open the related document.
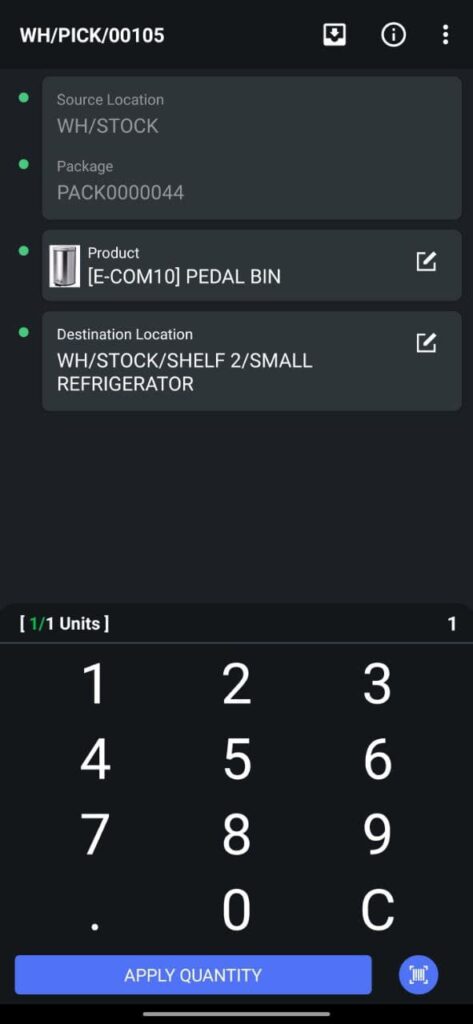
You can also scan a barcode of the PO/Reference to open the needed transfer. - By default, the app shows the product to pick. Scan its barcode to confirm the product or use manual input (pencil icon) to find and confirm a product manually.
- Add QTY of the product and pack products if needed using a pack button, then click on the “Apply Quantity” button to move the product. The next item to pick will appear automatically (if any are left).

Warehouse operations settings
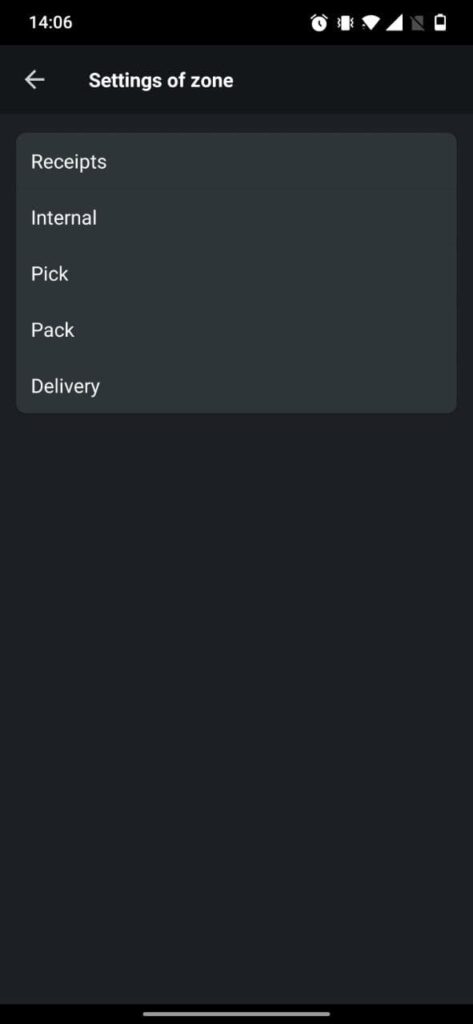
Each zone (receiving, internal transfers, pick, pack, and delivery, etc.) has its own specific settings. Go to the top right corner, open the additional menu, and click on the settings button. Configure any zone to follow your business procedures.
The app can suggest the next item pick or force you to scan source/destination location, serial/lot, or packages/consignments. You can adjust only needed fields to validate or even allow moving items without additional scans. All settings are described well; you can open each of them and read the description to understand if you need to activate some of them.

Inventory Adjustments
The Inventory Adjustments menu is for the regular inventory process. You can make an inventory by product or by location (or a combination of both). Note that you can always create a new inventory inside Odoo and use the app only for running it. This way users need only process inventory rather than create them on their own.
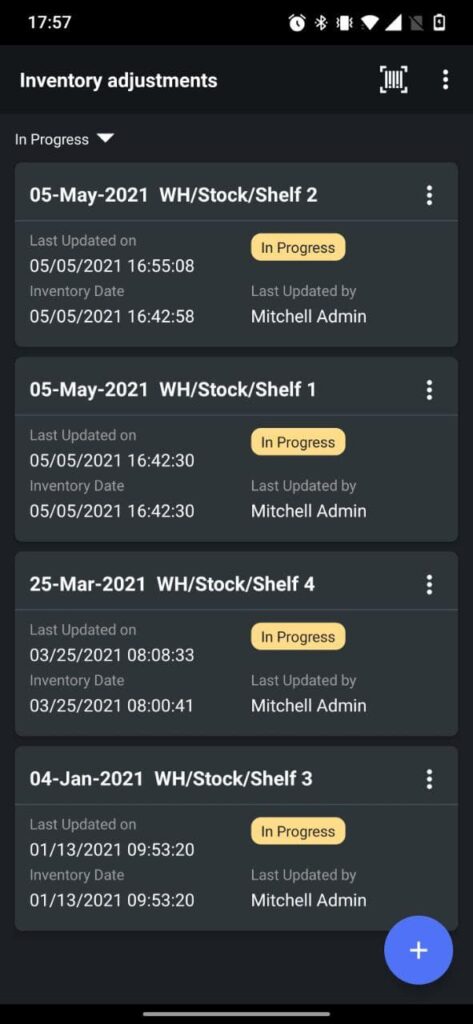
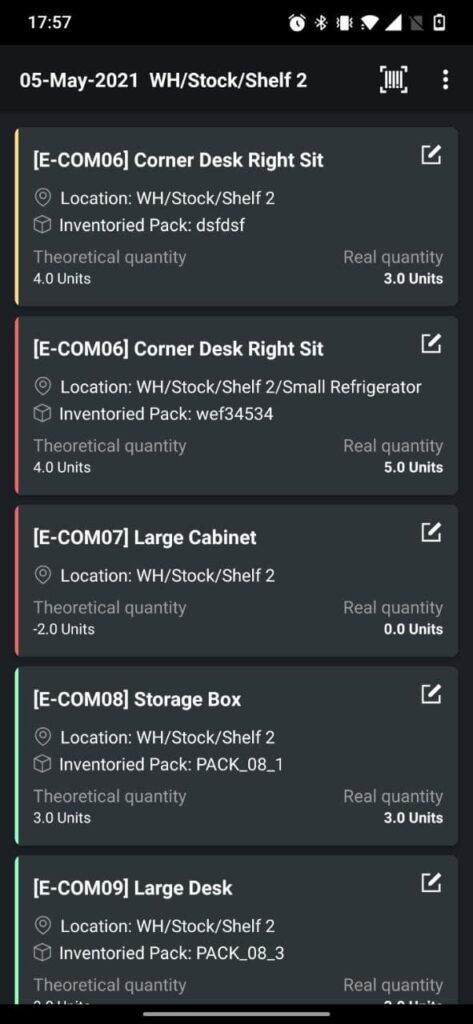
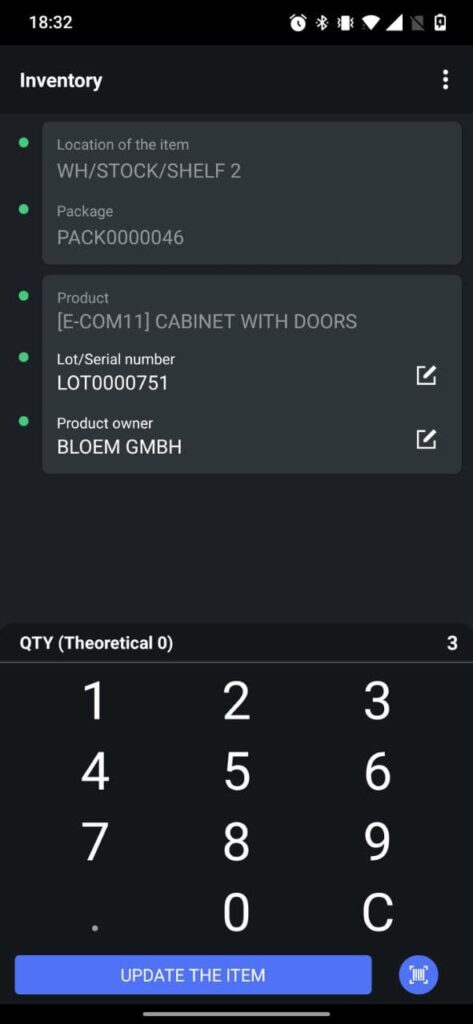
After creating (opening) a new inventory, you will be able to see the list of items you have to scan and the QTY of items you expect to see (theoretical quantity). Every item has its own card with a color marker on the left side:
- The yellow line means that the app is still expecting you to scan more items.
- The green line means that expected QTY is now equal to the QTY you have scanned.
- The red line means that you found more items than expected (it might be OK to find more, just pay attention to such cases).
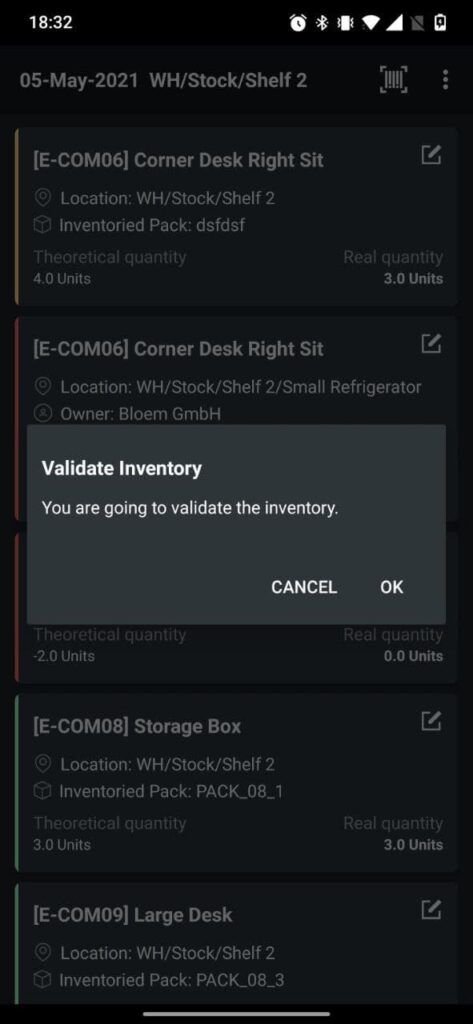
After all items are scanned, the inventory can be validated. Click on settings (3 dots at the right top corner) and then on the “validate” button.
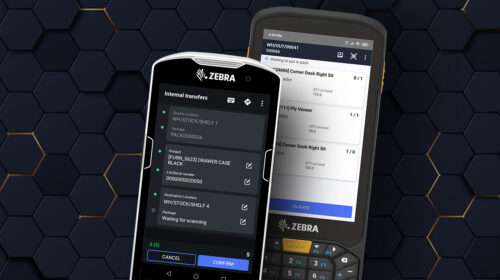
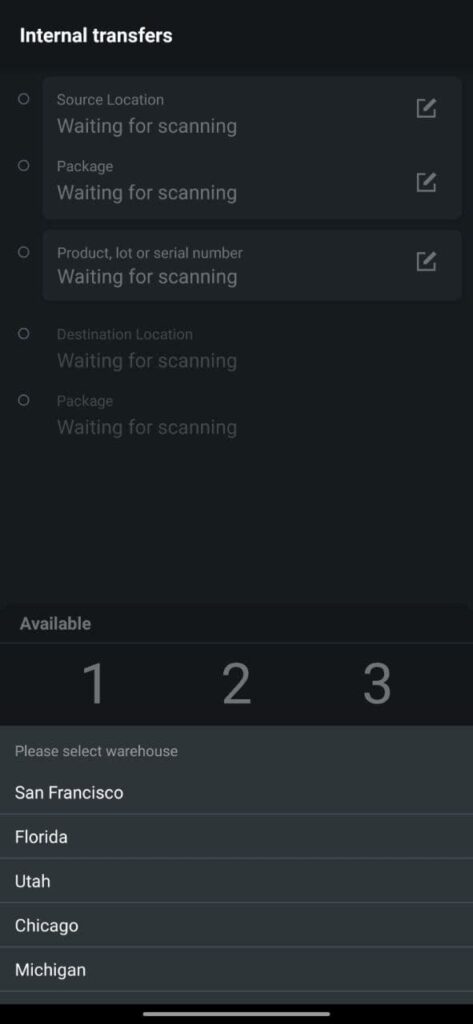
Internal transfers
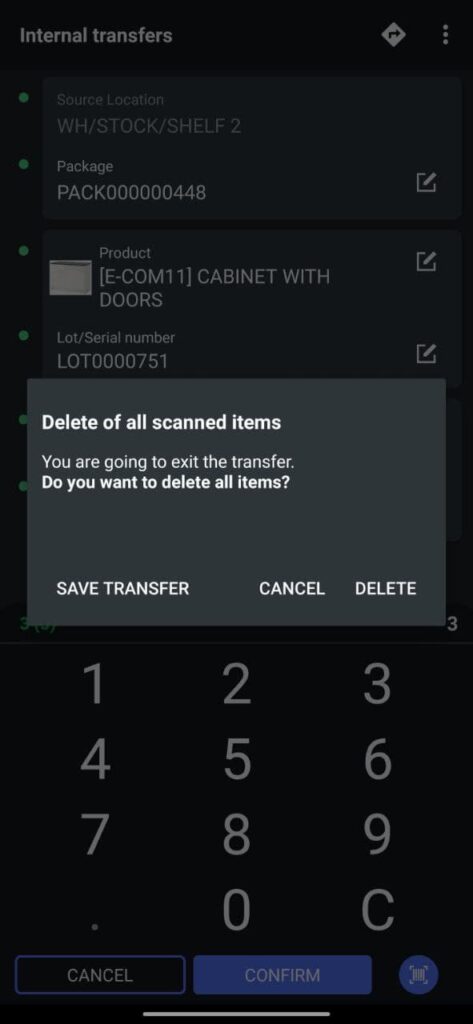
This feature allows moving an item from one location to another, in just a couple of scans. Scan the item, scan the location where you are going to move the item, and then confirm quantities. It’s very convenient to rearrange stock or simply to move items/packages from one location to another.
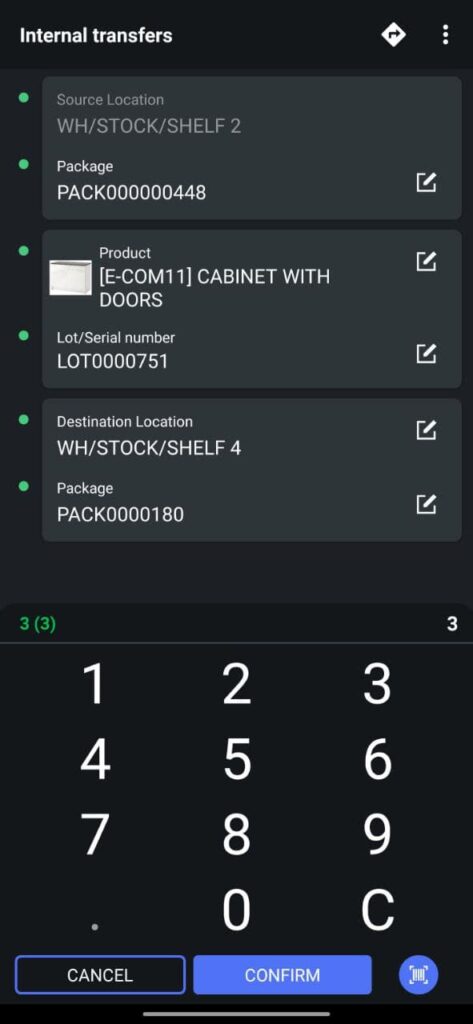
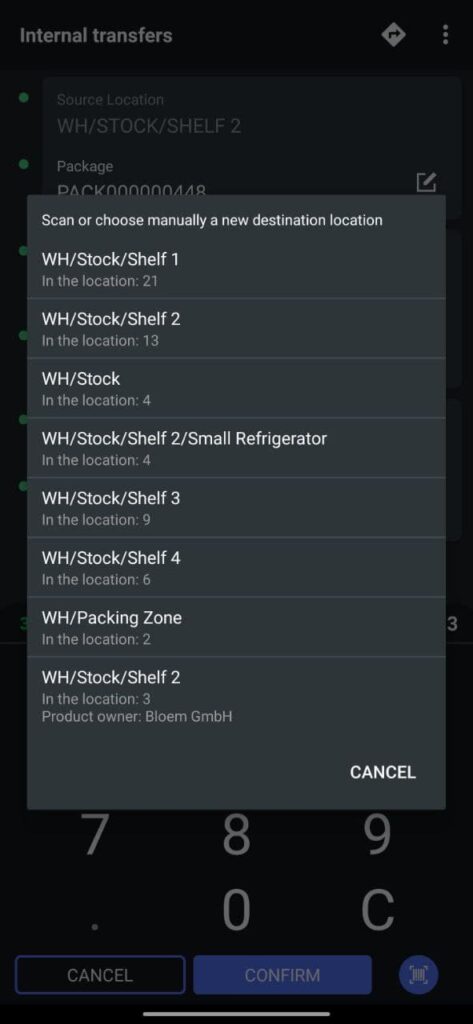
You can define from where to move in an item by scanning a source location. You can specify a needed lot or a serial number of the item you want to move by simply scanning it. You can also specify the product owner (use consignments settings) or even move the entire package.
Just scan the package barcode and then move it to a new destination location. All items inside the package are moved as well as the package. Use the internal transfers menu to unpack any package just with one tap.
After scanning any item, you can immediately get information about its location in other storage cells throughout the warehouse. Thus, you know in advance where else (and in what quantity) this product is. All this will help you to correctly and quickly redistribute your inventory, directing products to where they are lacking.
External transfers
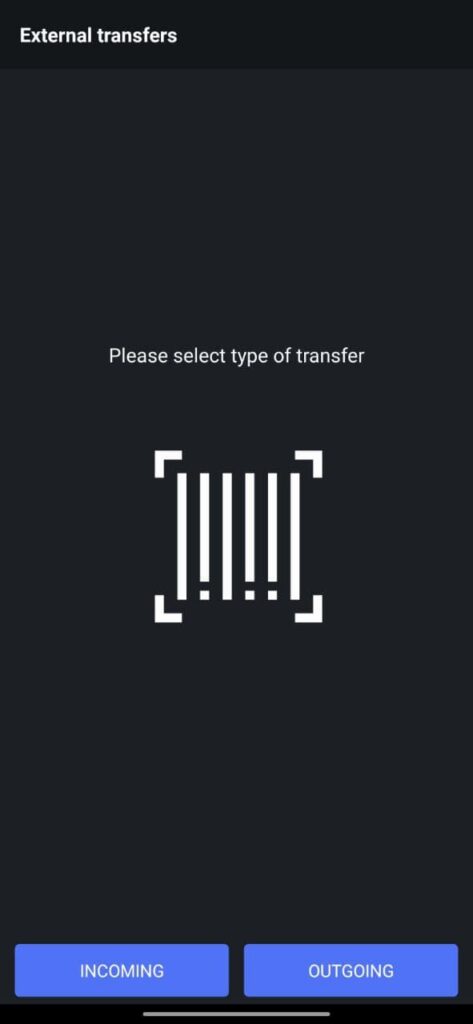
This menu creates incoming or outgoing shipments without a need to create a sales or purchase order. The steps are simple.
- Choose what you want to do: receive or send products.
- Scan products one by one to set QTY.
- Specify LOT or Serial numbers (if any).
- Validate the transfer to register incoming (or outgoing) movements.
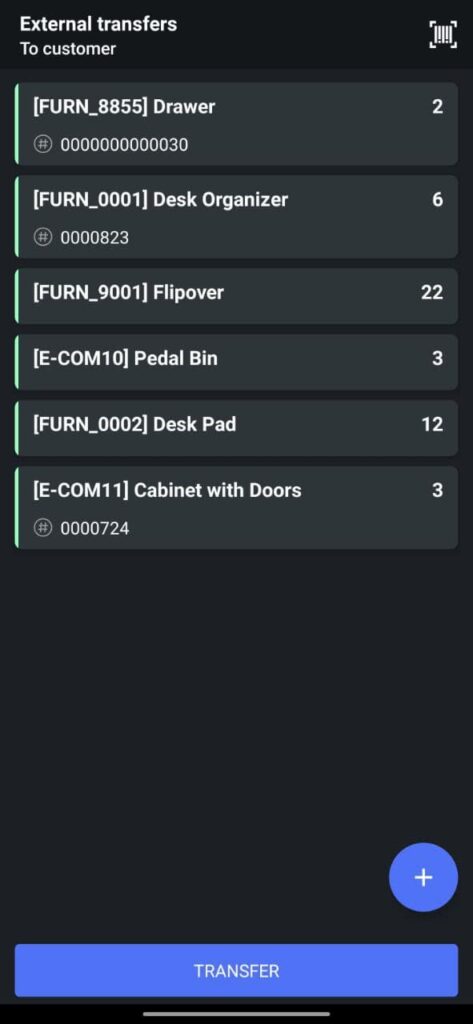
The logic is similar to the internal transfers menu, but here we move items in or from the warehouse.
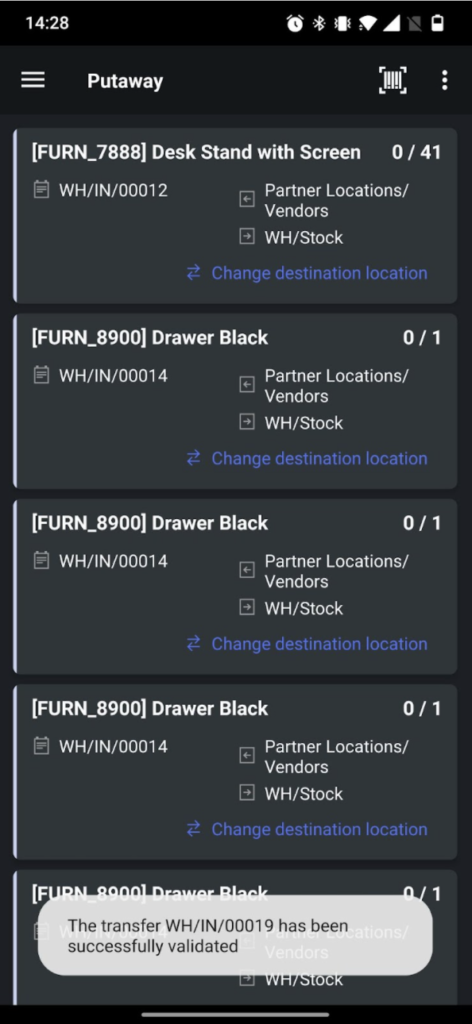
Putaway
After the goods have been taken to the warehouse in the input zone, these goods must be moved to the appropriate storage locations. You can instantly place items from different purchase orders into their permanent storage locations by using the Putaway menu.
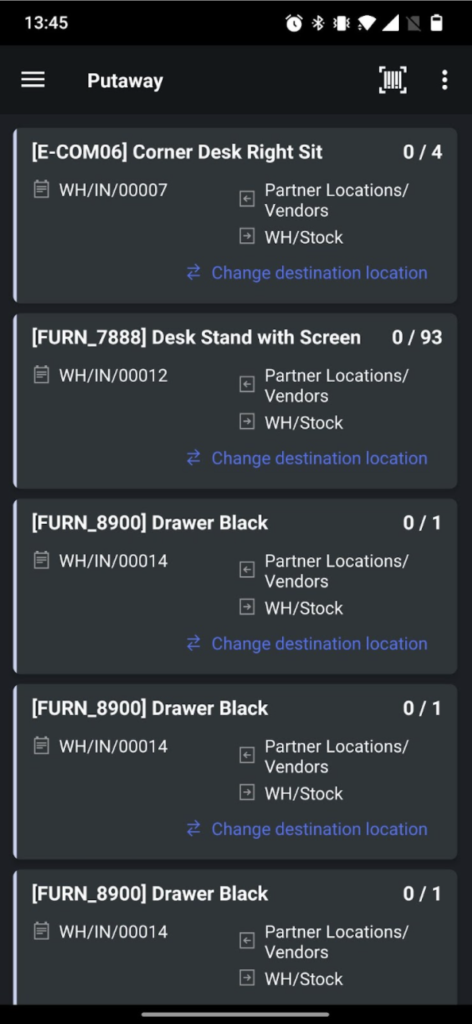
The Putaway menu automatically analyzes your settings and shows all products ready for placement depending on these settings:
- Receive goods directly (1 step)
- Receive goods in input and then stock (2 steps)
- Receive goods in input, then quality check and then stock (3 steps)
If a putaway rule has been created for a product, the application will offer to place it there. In addition, the Ventor application will show where else this product is in the warehouse. And besides that, you can still replace recommended places to any available on your own. Note that with the Ventor app, a few users can do putaway at the same time.
Products placement
- Take any product from the batch into your hands and scan its barcode.
- Get information about all the putaway rules and locations where you can find this product.
- A warehouse worker can decide where to place the product based on all the information above.
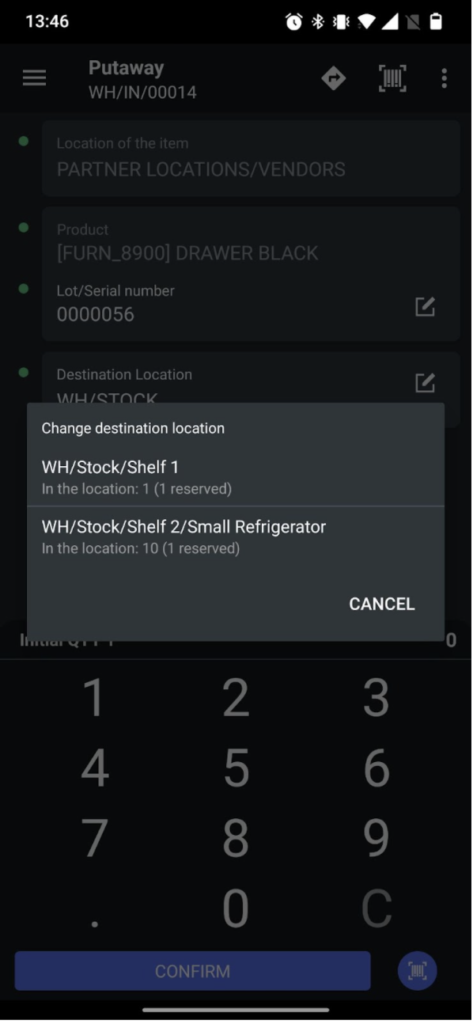
- The worker goes to the desired place in the warehouse, puts this product there, scans the final location of the product, and then enters its quantity.
- The placement of the goods is completed, and the distributor returns to the input zone for a new item.
- As soon as all items in one document will be moved to shelves, the transfer will be confirmed automatically.
Packing
A dedicated menu for the easiest packing management. Open a needed transfer (stock picking) with items ready to be packed. Scan line by line to confirm QTY and click the “put in pack” button to add a new package. Afterward, you can continue scanning other items.
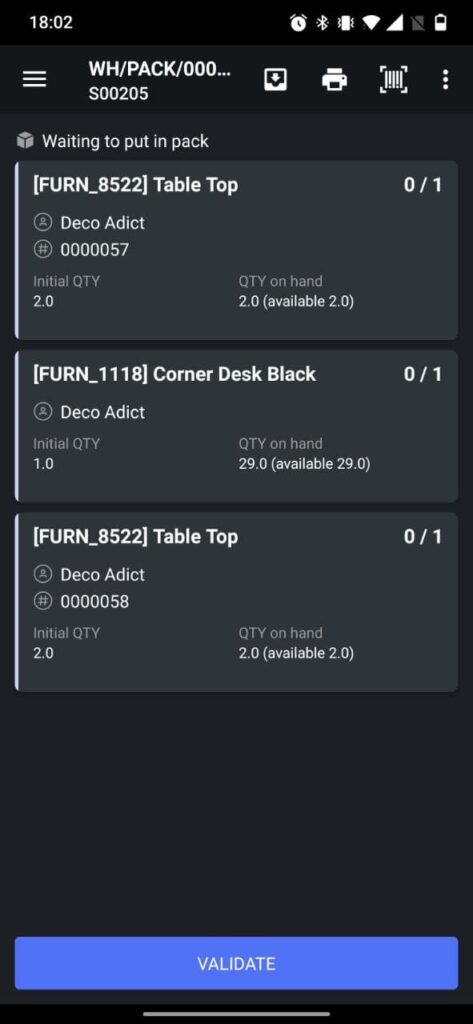
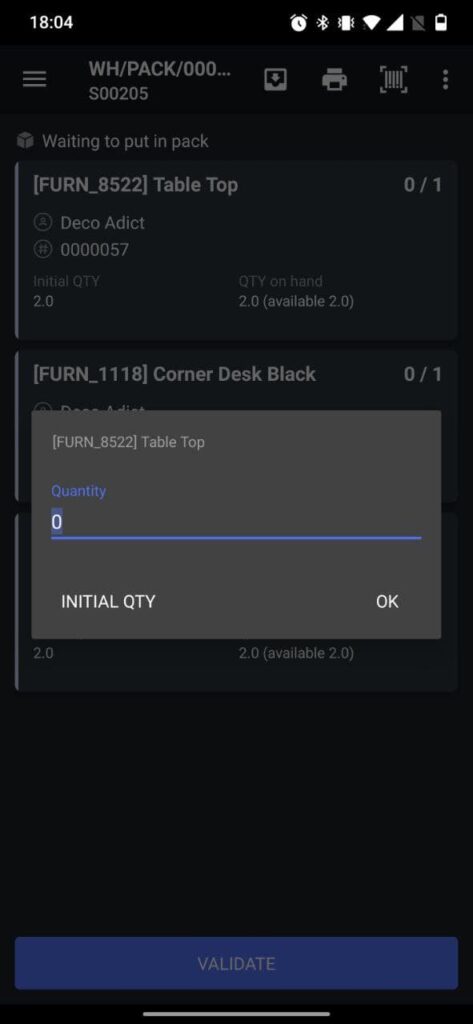
As soon as a box is full, you can click on the “put in pack” button to generate the next package. The main difference between the warehouse operations menu and packing is that here you can see the whole list of the products that you need to pack. Moreover, you can scan them in any order and generate a package every time if a box becomes full.
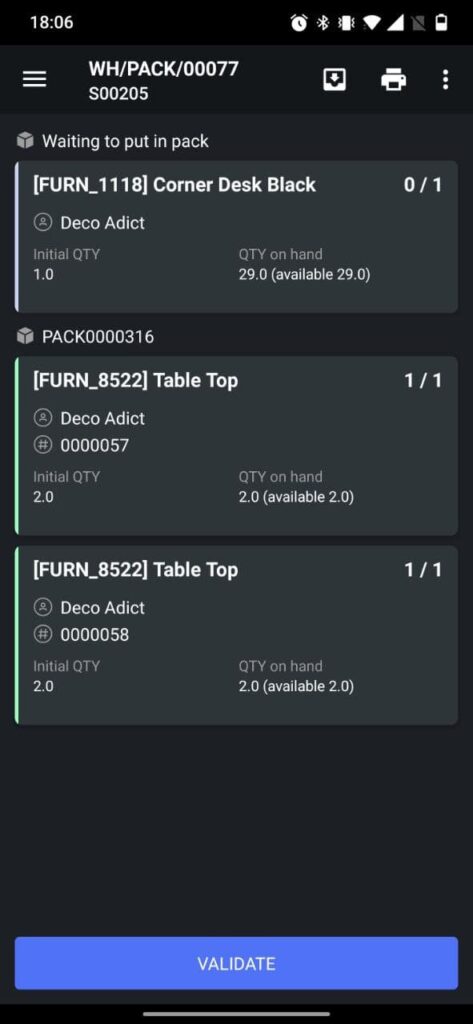
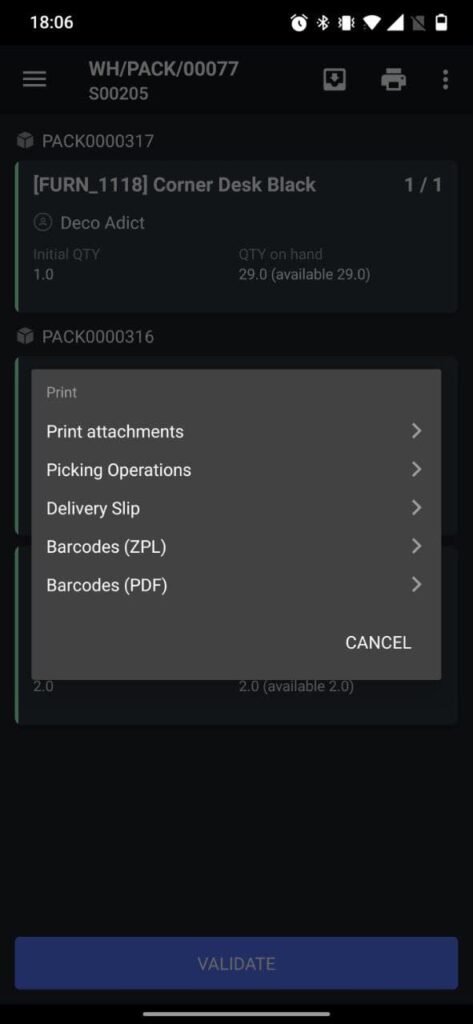
Additionally, you can print all package labels just with one print button. This menu is ideally working for a dedicated packing zone and packing operator. As a result, you make a quality/quantity control of every item and generate a pack at the right time.
Instant inventory
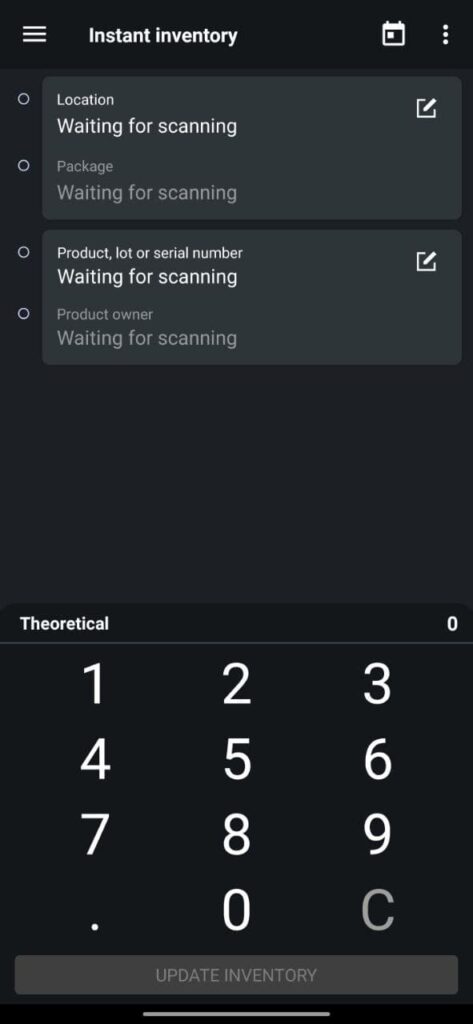

The menu allows making a quick inventory with one item in one location. This concept is so simple and straightforward that many companies use this menu as the only one for their regular inventories instead of performing inventory adjustments.
Scan the location and the item to immediately update QTY on hand. Don’t forget to specify the lot/serial number or package/ownership (consignments) if you have any of them for the given product. Check additional settings (3 dots at the top right corner) to manage packages or consignments or if you want to activate additional features.
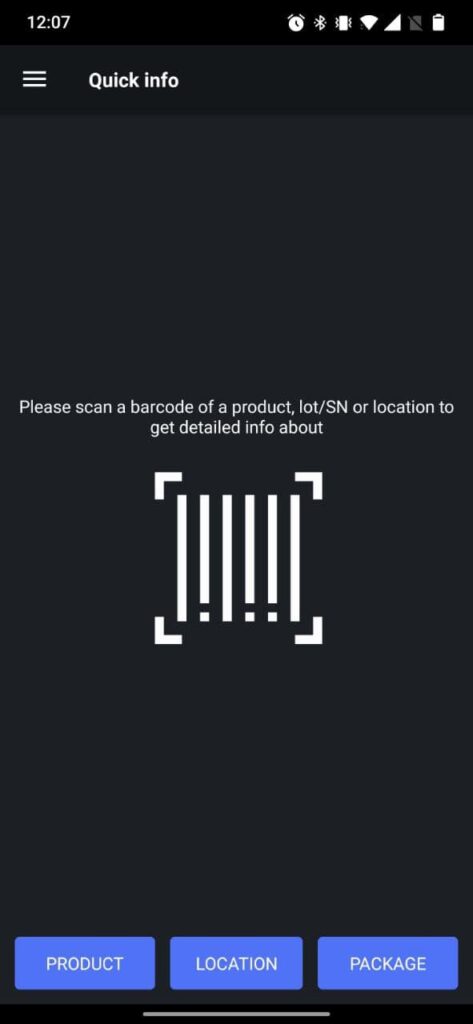
Quick info
Watch this video about the Quick Info menu or read the article – https://ventor.app/guides/odoo-quick-info/

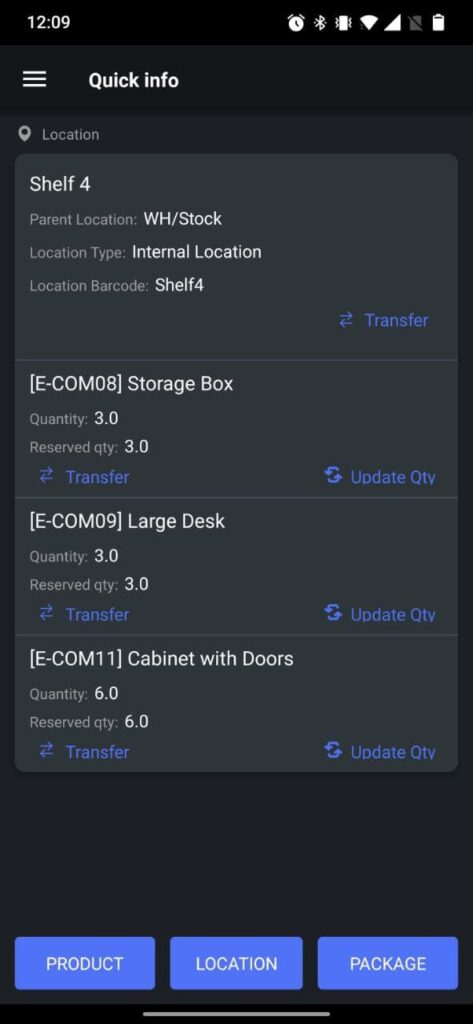
The Info menu can show you all information about products and their lot/serial numbers, locations, and packages. Scan a product (location, package, product owner, etc.) barcode to get comprehensive details about this product or its location.
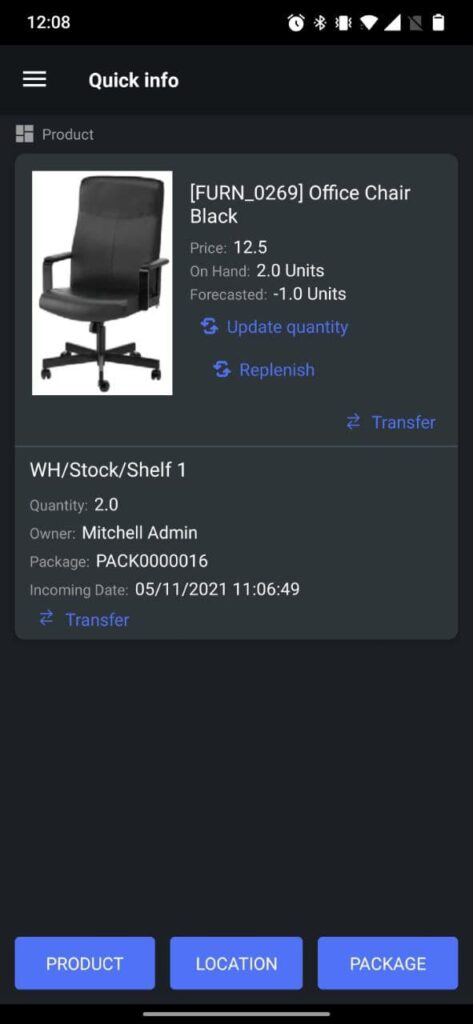
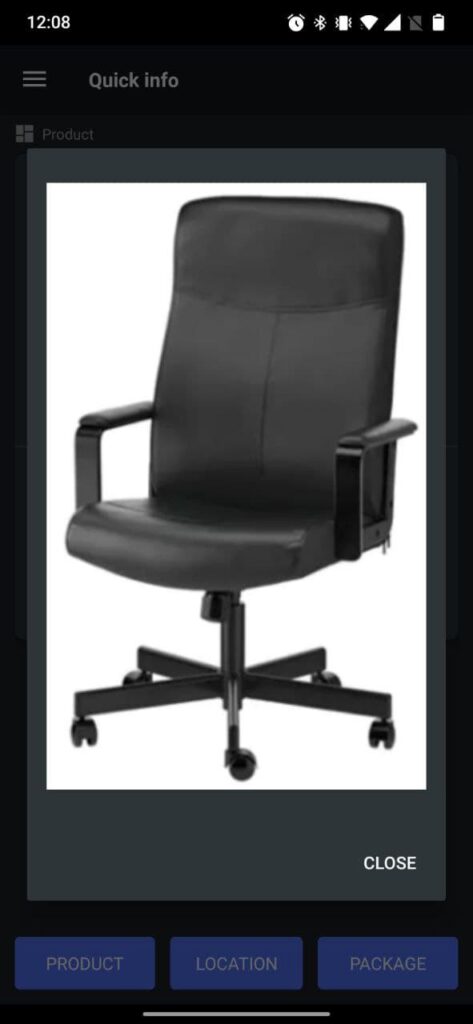
Clicking on the image will make the picture bigger and might be helpful for pickers.
You also can update the QTY of the product by using the “Update Quantity” button or make a product replenishment with the “Replenish” button. Clicking on the “Transfer” button will move you to the “Internal transfer” menu to move the product even quicker.
About
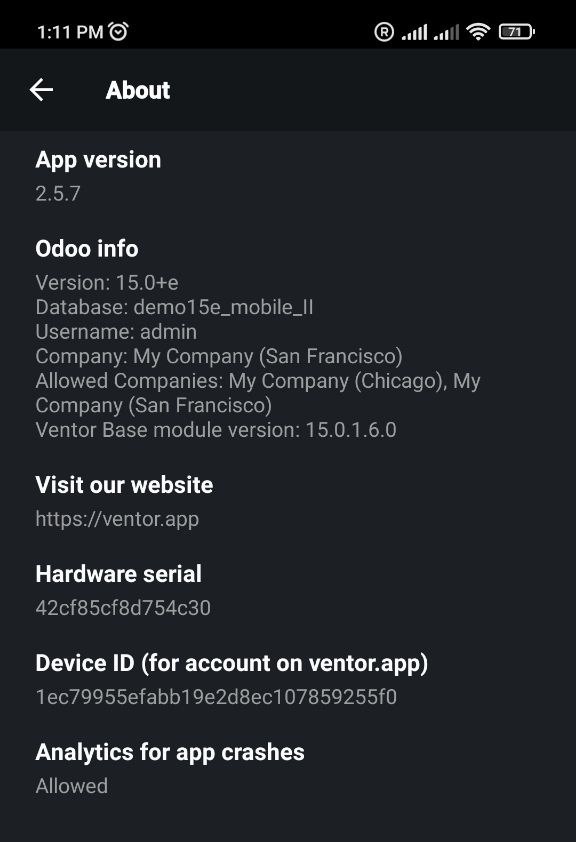
In the About menu you can check the app version, Odoo version, database name, user, company and other info.
If you have questions, please feel free to ask them in the comments section below.
CBDO at VentorTech